
Set up Croissant Pay in Shopify POS
Add the Croissant Pay tile that starts a payment and the Croissant tender that completes it. Configure both before your team accepts its first Croissant Pay sale.
- For
- Store managers
- Time
- About 3 minutes
- You need
- Shopify admin access
Before you start
- The Croissant app is installed on the Shopify store.
- You know which smart grid template is assigned to the store or location you are configuring.
- You can edit Point of Sale settings in Shopify admin. If these controls are unavailable, ask the store owner for permission.
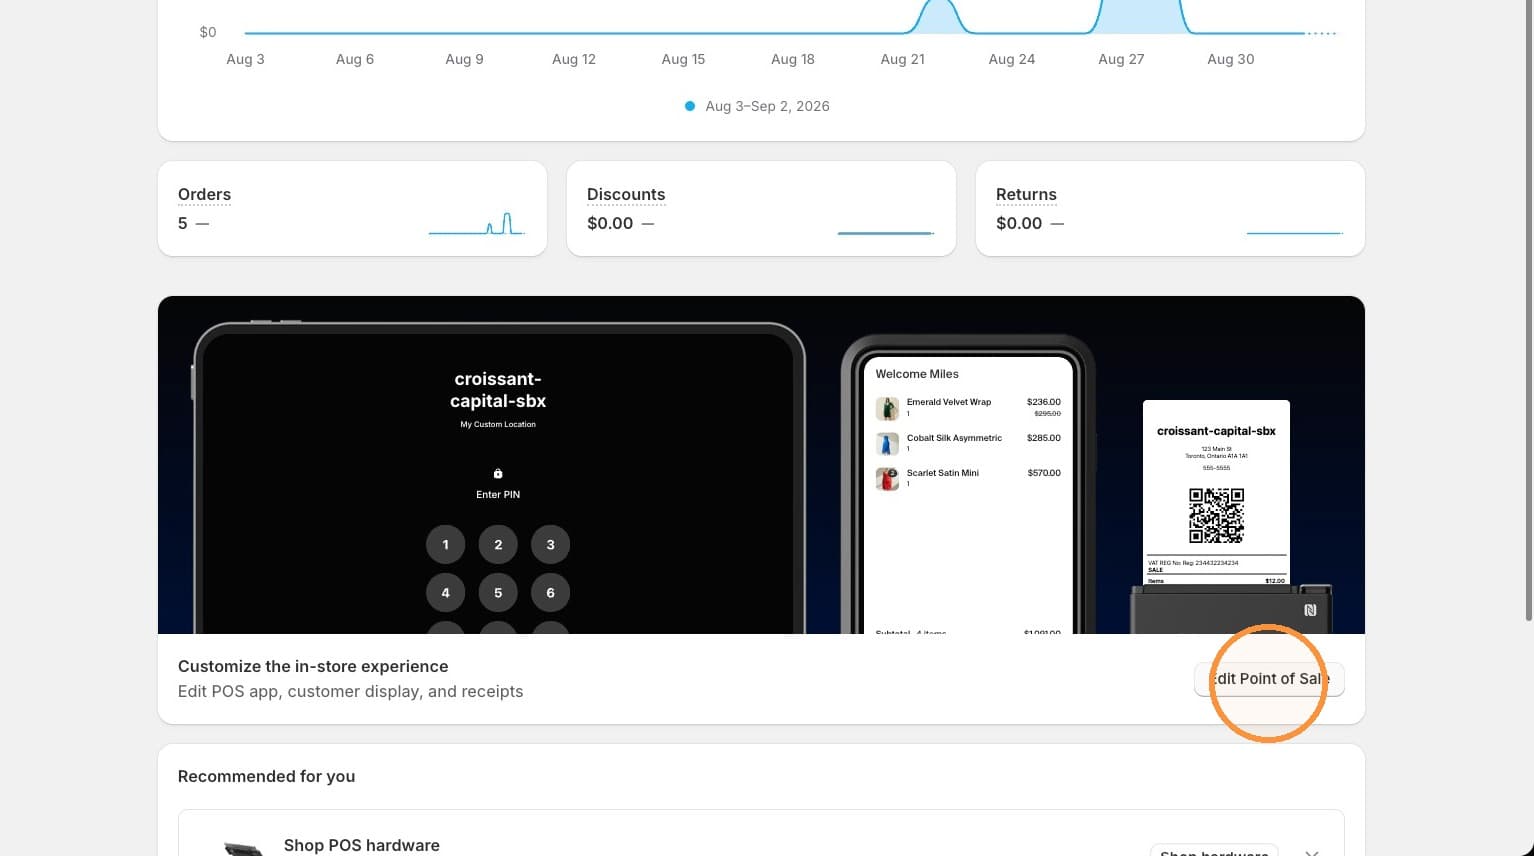
In Shopify admin, open Sales channels → Point of Sale, then select Edit Point of Sale under Customize the in-store experience.
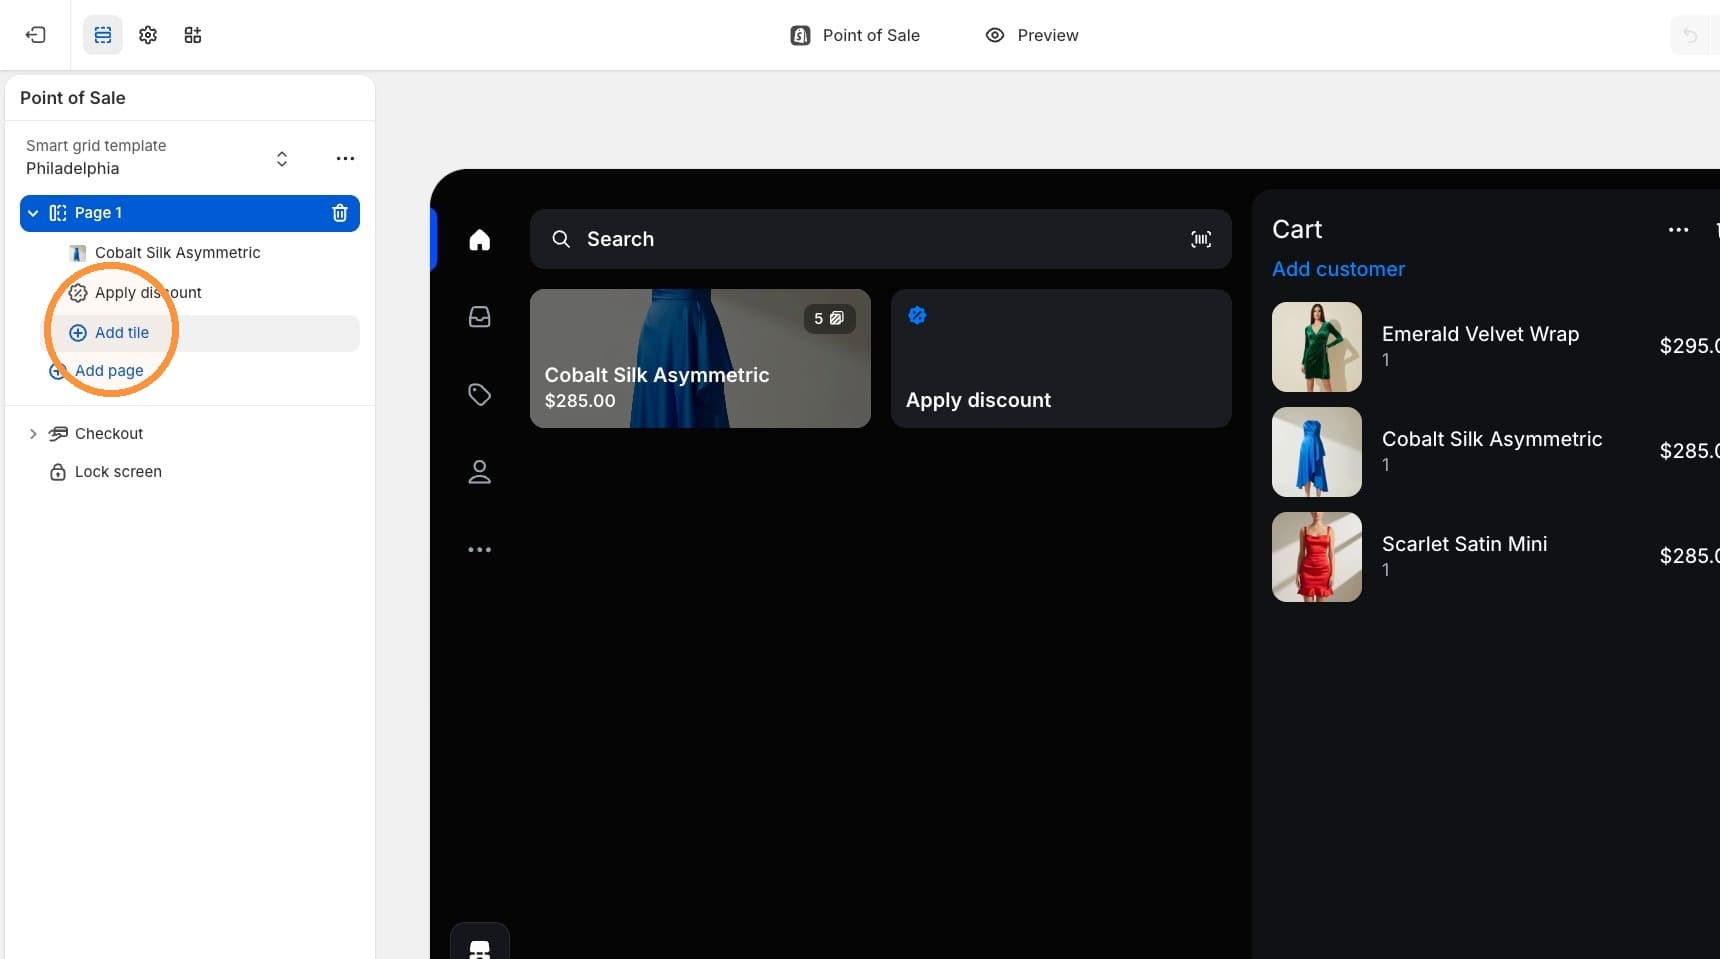
Select the smart grid template used by the location, then expand the page where associates should find Croissant Pay. Repeat this guide for each template used across your stores.
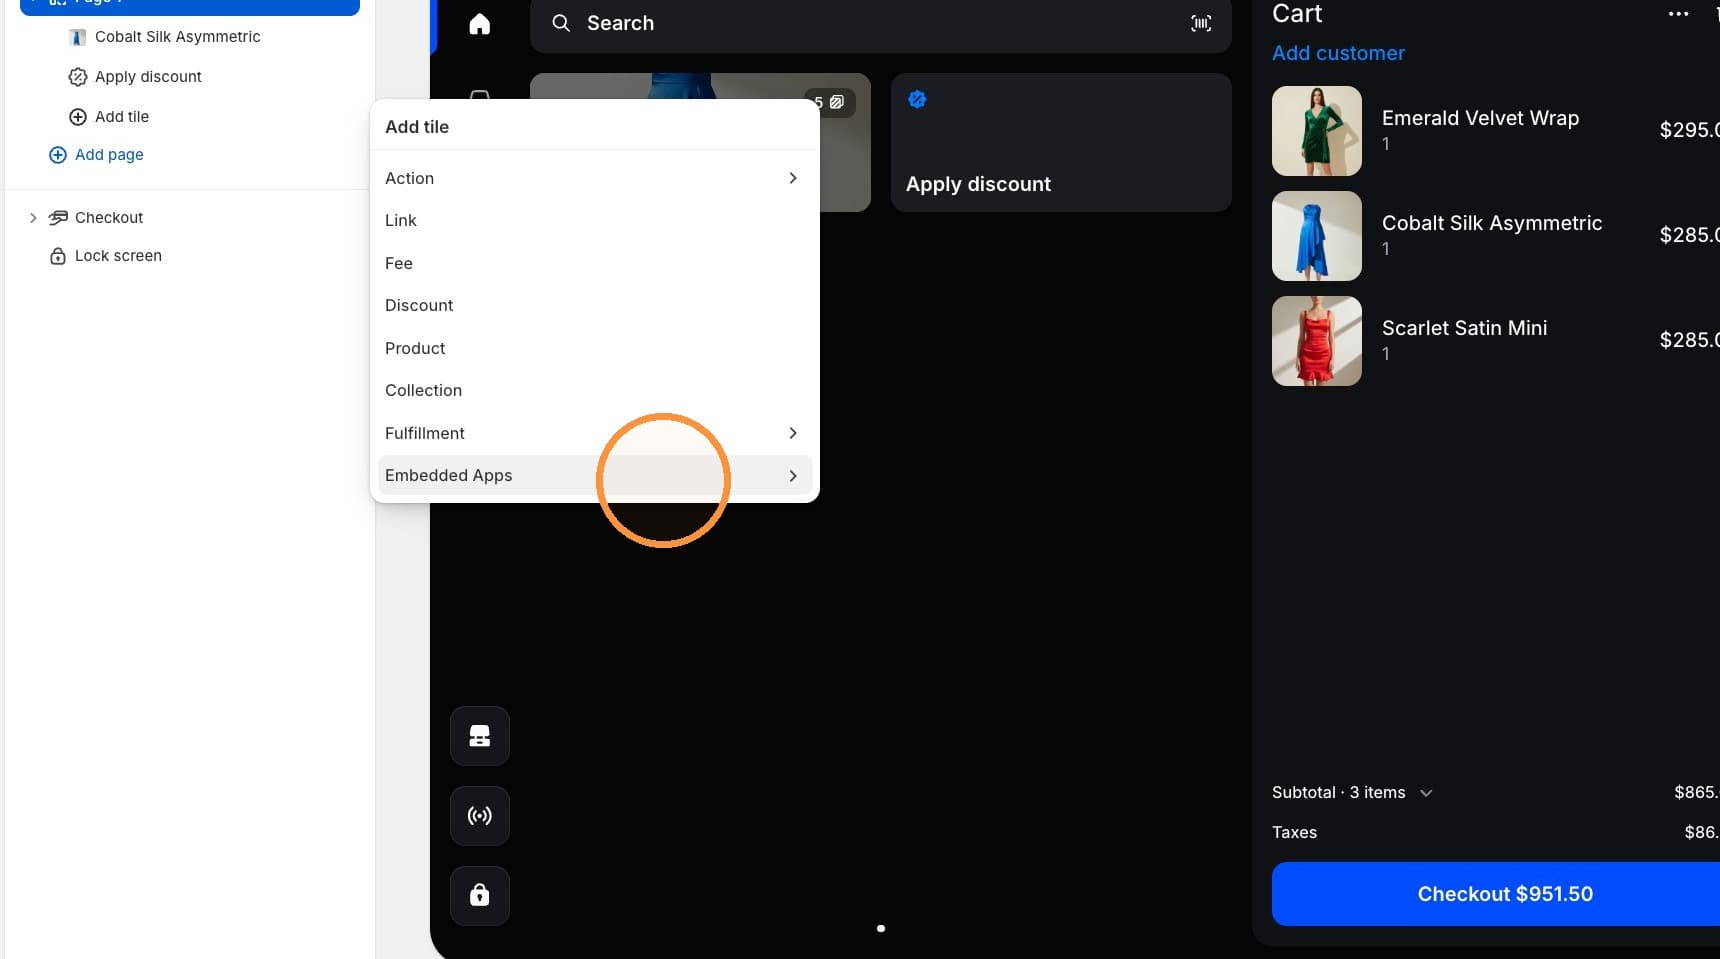
Select Add tile → Embedded Apps. Choose the Croissant app, then select Croissant Pay.
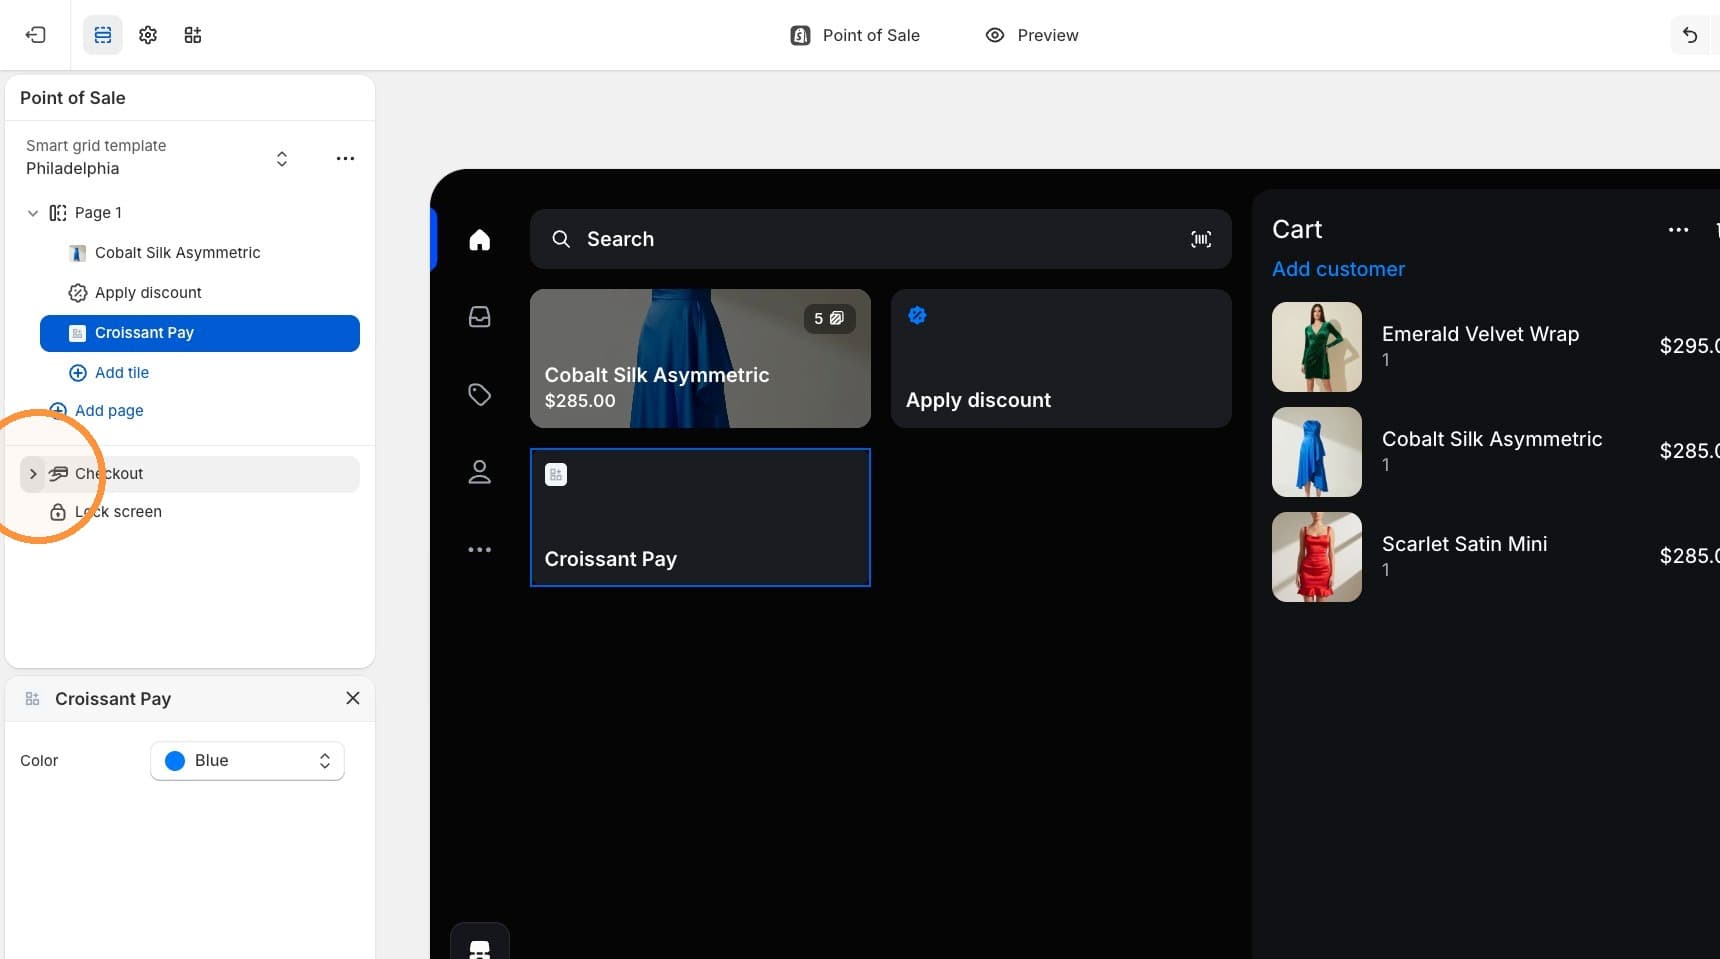
In the same editor, expand Checkout, then select Add custom payment type.
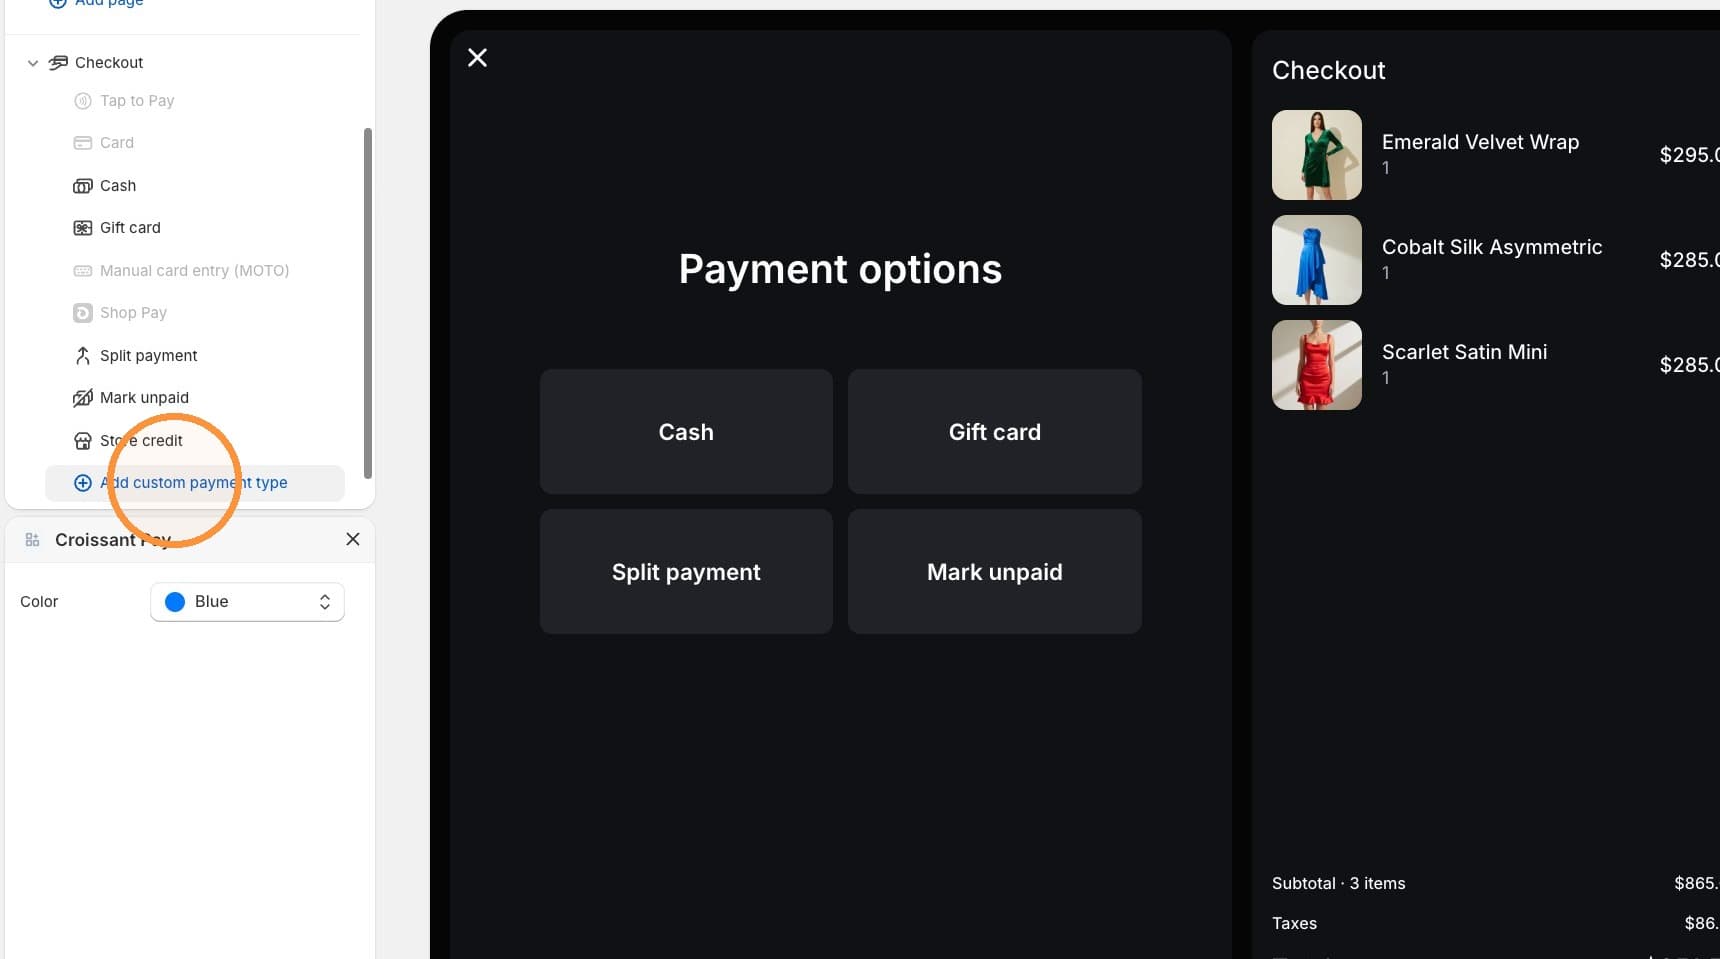
Enter Croissant as the payment method name, then select Add.
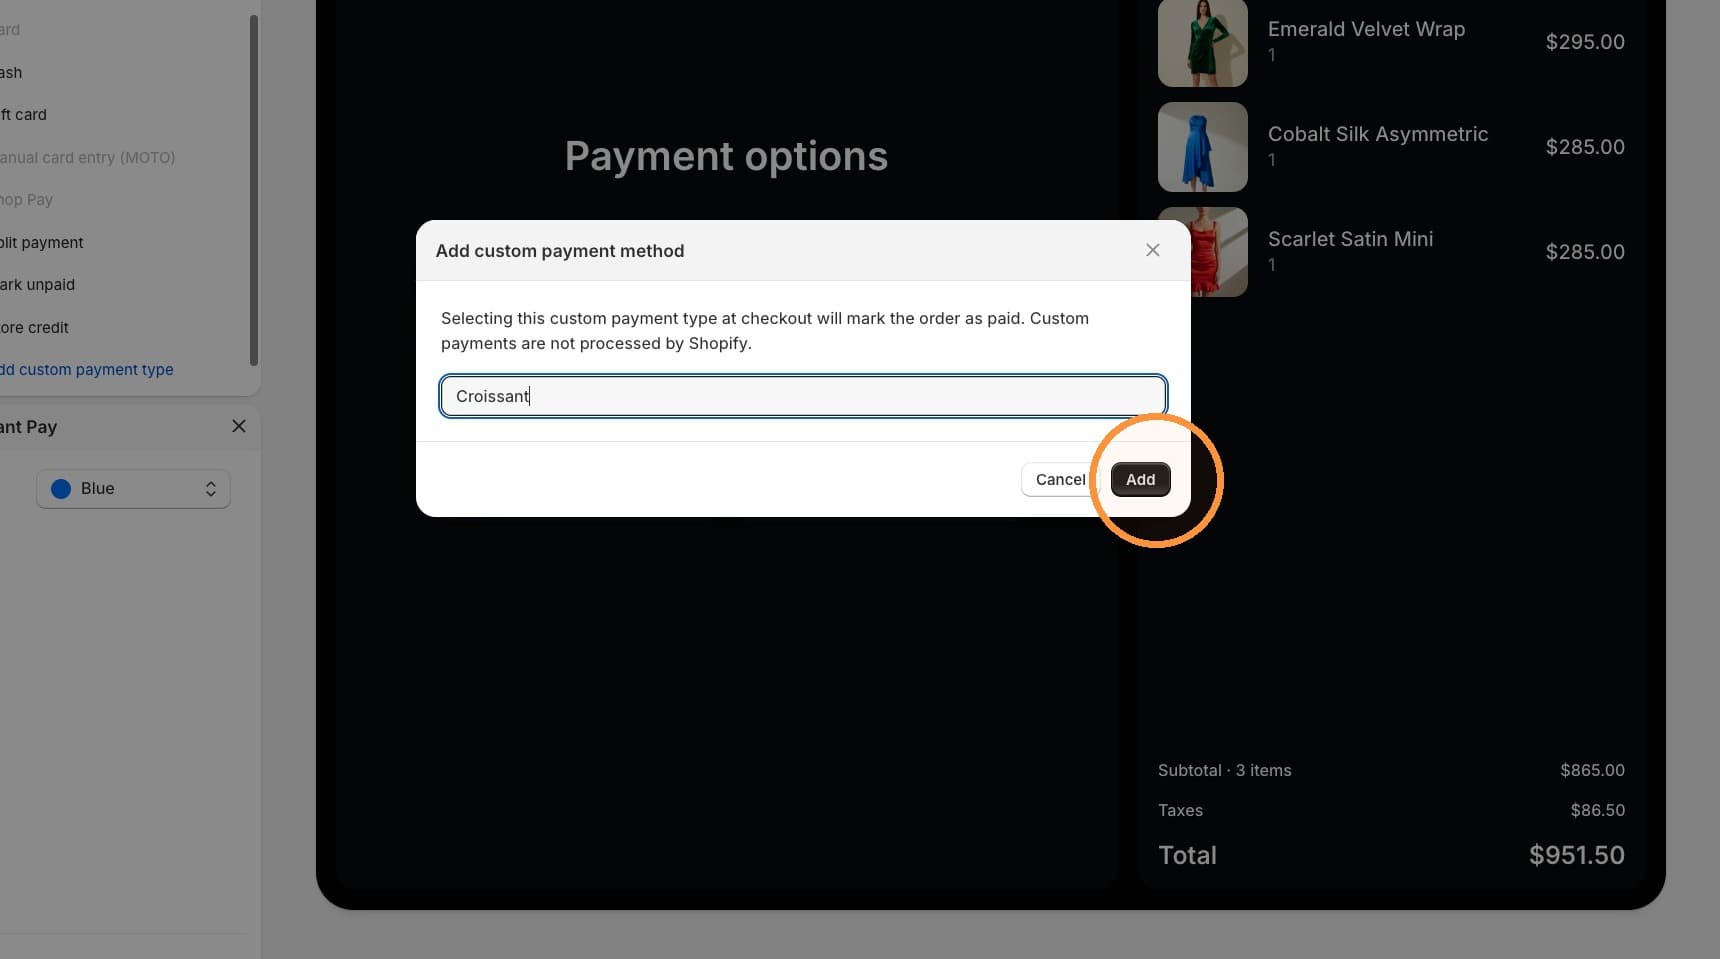
Save the smart grid changes, then open Shopify POS on a device assigned to the location. Confirm both of these before training the team:
- The smart grid includes a Croissant Pay tile.
- The payment-method screen includes Croissant after an associate taps Checkout.